

DIY Foil Shaver Cleaning Brush: Transform an Old Toothbrush into an Effective Cleaning Tool

I. Introduction: Starting with “Cleaning Accessories”
Many people focus only on how clean a shave is when buying a foil shaver, often neglecting its maintenance details.
Over time, hair, dander, and dust accumulate inside the shaver head. If not cleaned regularly, the shaving experience can become choppy or even twitchy. And during maintenance, a small accessory—a cleaning brush—often becomes an unexpected extra expense.
Actually, we can easily DIY a high-efficiency foam shaver using an old toothbrush.
This not only saves on the cost of accessories but also ensures it’s environmentally friendly, practical, and consistently effective.
This “DIY foam shaver” method is perfect for users who enjoy hands-on work, pay attention to detail, and are thrifty.
2. Why make your own foil shaver?
1. Reduce the cost of purchasing spare parts
Many users find that after
using a foil shaver for a while, the cleaning brush, a small accessory, often needs to be purchased separately. While its price isn’t high, the cumulative cost can be significant.
Making your own cleaning brush requires only an old toothbrush and a few minutes, allowing for long-term use at virtually no cost.
More importantly, this DIY method allows you to freely adjust the bristle length and angle according to the shape of the blade head, resulting in even better cleaning.
2. Environmental Protection and Sustainability
Once a toothbrush has served its purpose, most people simply throw it away.
But if you transform it into a foil shaver, you can give it a second life.
This not only saves resources but also aligns with the concept of “sustainable living.”
This seemingly simple modification is actually a way of taking responsibility for the details of life.
3. Improves shaving performance and extends shaving life.
Regularly cleaning your foil shaver head prevents hair from clogging and keeps the blades running smoothly.
Lack of cleaning not only affects shaving efficiency but can also cause the shaver head to overheat or wear out prematurely.
Using a homemade cleaning brush makes maintenance easier and naturally extends the life of the shaver head.
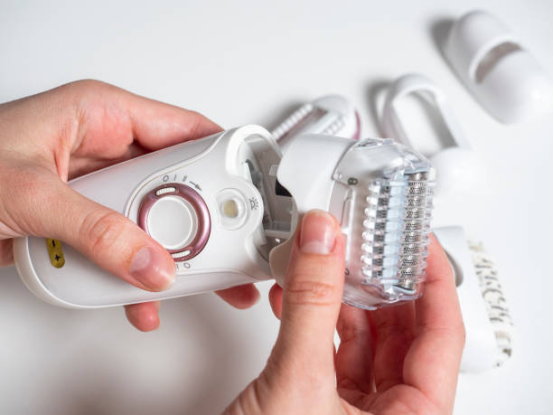
III. DIY Foil Shaver Cleaning Brush: Practical Steps
1. Prepare tools
Before you begin, prepare the following materials:
- An old toothbrush (the bristles should not be too stiff or too wide);
- Small scissors or a utility knife;
- A bottle of alcohol spray or mild cleaning agent;
- Clean cloth or paper towel.
2. Modify toothbrush heads
The operation is actually very simple, requiring only four steps:
- Trim the toothbrush head, leaving only about 1–1.5 cm of bristles. This makes it easier to reach into the mesh of the foil shaver.
- If the bristles are too dense, you can trim some of them to make them sparser and prevent them from getting stuck.
- If you are worried about the bristles becoming loose, you can lightly apply a small amount of glue to the base to secure them.
- Finally, wash and dry the toothbrush to ensure there is no toothpaste residue or odor.
- After this modification, you will have a cleaning brush that is perfectly compatible with the Foil Shaver.
IV. How to clean a foil shaver with a DIY cleaning brush
Step-by-step instructions
- First, turn off the power: unplug the device to ensure its safety.
- Remove the blade cover: This can be easily removed from most foil shavers.
- Gently brush the surface and crevices of the blade with a toothbrush. Be sure to be gentle and clean in the direction of the metal foil mesh.
- If it is washable, rinse with warm water; if not, spray alcohol onto a cloth and then wipe the edge of the blade.
- After cleaning, let it air dry. Do not put it back immediately to ensure that no moisture remains.
- This method is simple, safe, and applicable to almost all foil shaver models.
V. Why is this DIY method effective?
In fact, the bristles of an old toothbrush are very similar in texture to commercially available cleaning brushes.
Simply trim them and adjust the density, and they can easily remove stray bristles and dander stuck in the foil shaver head.
Furthermore, because you can trim the bristles to fit the shape of the shaver head, the brush head angle is more flexible, allowing you to clean crevices that are difficult for ordinary brushes to reach.
By consistently using this cleaning method, you will find that:
- Shaving is smoother;
- Reduced heat generation at the blade tip;
- Noise reduction;
- The lifespan of the foil shaver is significantly extended.
VI. Safety Tips and Details
Please note the following points during the manufacturing and use process:
- The bristles should be of the right stiffness: too stiff and they will scratch the foil; too soft and they will not clean thoroughly.
- Do not allow liquid to seep into the machine body: For non-waterproof models, please wipe with a spray cloth instead of rinsing directly.
- Keep clean and disinfected: Old toothbrushes should be thoroughly disinfected before being reused; they can be soaked in alcohol for a few minutes.
- Be gentle: especially when cleaning the mesh, avoid strong pressure or rotating brushing.
- Regularly lubricate the blade: After cleaning, apply two drops of lubricating oil to reduce friction and noise.
These seemingly small details actually determine the lifespan and performance of the foil shaver.

VII. The dual benefits of cost savings and extended lifespan
By DIY cleaning with a foil shaver brush, you can gain two practical benefits at the same time:
1. Significantly reduces parts costs
Purchasing official cleaning brushes or replacements usually incurs additional costs, while DIY versions are virtually free.
An old toothbrush can last for months, truly embodying “waste recycling.”
For cost-conscious users, this is a smart and sustainable option.
2. Extend service life
Regular cleaning prevents shaving hair buildup, reduces blade wear, and makes the device run more smoothly.
Cleaner blades mean a more comfortable shaving experience and keep the machine looking brand new.
Furthermore, the habit of consistently maintaining a foil shaver reflects a meticulous approach to life.
This philosophy of “careful maintenance” is itself an important component of a superior user experience.
8. Make DIY a way of life
You might hesitate a little the first time you try it, but once you do, you’ll find it simple and practical.
From then on, you’ll never hesitate to order a small brush again.
More importantly, you’ll start to re-evaluate the potential of those “old things” in your home—they’re not just junk.
DIY foil shaver cleaning brushes are not just about saving money but also about respecting your belongings and caring for the environment.
Through these small, daily actions, you’ll discover that cleanliness, economy, and environmental protection can all be achieved simultaneously.
IX. Conclusion: Small tools, great wisdom
An old toothbrush may seem insignificant, but with a simple modification, it can breathe new life into your foil shaver.
This DIY foil shaver cleaning brush method not only reduces the cost of purchasing accessories but also extends the life of the device, making every shave smoother and cleaner.
Next time you clean, try this little trick.
Sometimes, the smart thing to do isn’t to buy more accessories but to learn to use what you already have more intelligently.